
使用 React、TypeScript、Vite、Ant Design、Less、Zustand 开发 Chrome V3 插件
本章是使用 React、Vite 等来开发 Chrome 插件。
从创建项目开始,一步一步的开发,包含项目所用到的状态管理、打包、UI 组件库、Less 等。
一、使用 Vite 创建 React 项目
npm create vite@latest # npm
yarn create vite			 # yarn
pnpm create vite # pnpm选择 React 和 TS

进入项目,并进行 pnpm i 安装 node_modules
pnpm i # 安装 node_modules 包此时项目文件夹目录为:
.
├── README.md
├── index.html
├── package.json
├── pnpm-lock.yaml
├── public
│   └── vite.svg
├── src
│   ├── App.css
│   ├── App.tsx
│   ├── assets
│   │   └── react.svg
│   ├── index.css
│   ├── main.tsx
│   └── vite-env.d.ts
├── tsconfig.json
├── tsconfig.node.json
└── vite.config.ts二、修改 React 项目
因为我们是开发 Chrome 插件,需要 manifest.json、service-worker、content、popup 页面等文件,所以需要对之前的项目进行删除,并添加我们自己的配置
1. 项目修改
- 删除项目根目录下的
index.html文件 - 删除
src目录下的App.tsx、main.tsx、App.css、index.css - 删除根目录下的
public文件夹 - 在根目录下创建
manifest.json文件,此乃插件入口文件 - 创建
popup页面:在src目录下创建popup文件夹,popup文件夹中创建App.tsx、main.tsx、App.css、index.html、index.css、components文件夹,components文件夹下创建TestPopup.tsx文件(这些新建的文件内容可以参考刚刚删除的文件,但要注意修改index.html文件中main.tsx的引入路径)在TestPopup.tsx文件中写入Popup Page文案 - 创建
content页面:在src目录下创建contentPage文件夹,contentPage文件夹中创建App.tsx、main.tsx、App.css、index.html、index.css、components文件夹,components文件夹下创建TestContent.tsx文件(这些新建的文件内容可以参考刚刚删除的文件,但要注意修改index.html文件中main.tsx的引入路径)在TestContent.tsx文件中写入Content Page文案 - 创建
background:在src目录下创建background文件夹,background文件夹中创建service-worker.ts,文件里面写入console.log('background service-worker file') - 创建
content:在src目录下创建content文件夹,content文件夹下创建content.ts,文件写入console.log('content file') src目录下新建icons文件夹,用于放置插件icon,可以网上找个icon.png
2. 步骤解析
- 前三步就是删除
- 第四步是创建插件的入口文件,此文件必须有,在根目录和
src目录都行,但一般习惯放在根目录中 - 第五步是创建
popup弹框页面,如果你的插件不需要可以忽略这一步 - 第六步是创建
content页面,和第八步的content的区别是这个最终打包为index.html文件,通过iframe的形式插入对应域名的页面中 - 第七步是创建
service-worker页面,V3虽然也叫background,但是这个文件一般都写成service-worker - 第八步就是创建注入对应域名的
content.ts文件 - 第九步是放置插件的 16、32、48、128 的
png图片,可以用一张 128 的也行
3. 文件夹目录
.
├── README.md
├── manifest.json
├── package.json
├── pnpm-lock.yaml
├── src
│   ├── assets
│   │   └── react.svg
│   ├── background
│   │   └── service-worker.ts
│   ├── content
│   │   └── content.ts
│   ├── contentPage
│   │   ├── App.css
│   │   ├── App.tsx
│   │   ├── components
│   │   │   └── TestContent.tsx
│   │   ├── index.css
│   │   ├── index.html
│   │   └── main.tsx
│   ├── icons
│   │   └── icon.png
│   ├── popup
│   │   ├── App.css
│   │   ├── App.tsx
│   │   ├── components
│   │   │   └── TestPopup.tsx
│   │   ├── index.css
│   │   ├── index.html
│   │   └── main.tsx
│   └── vite-env.d.ts
├── tsconfig.json
├── tsconfig.node.json
└── vite.config.ts三、配置项目
1. 配置 manifest.json 文件
1.1. 写入以下内容
{
  "manifest_version": 3,
  "name": "My React Chrome Ext",
  "version": "0.0.1",
  "description": "Chrome 插件",
  "icons": {
    "16": "icons/icon.png",
    "19": "icons/icon.png",
    "38": "icons/icon.png",
    "48": "icons/icon.png",
    "128": "icons/icon.png"
  },
  "action": {
    "default_title": "React Chrome Ext",
    "default_icon": "icons/icon.png",
    "default_popup": "popup/index.html"
  },
  "background": {
    "service_worker": "background/service-worker.js"
  },
  "permissions": [],
  "host_permissions": [],
  "content_scripts": [
    {
      "js": [
        "content/content.js"
      ],
      "matches": [
        "http://127.0.0.1:5500/*"
      ],
      "all_frames": true,
      "run_at": "document_end",
      "match_about_blank": true
    }
  ]
}1.2. 解析
manifest_version字段一定得是 3- 因为只有一张图,所以
icons和action/default_icon就用同一张图片 - 可以看到
action/default_popup配置的值为popup/index.html,是因为我想把项目build成这种路径 background/service_worker也是同理,要build成background/service-worker.js这种路径- 通了
content_scripts配置也是一样,build成content/content.js match配置了一个本地的路径,方便调试(使用vscode的Live Server插件或者node包启动一个服务)- 如果你想在哪个页面显示就配置哪个页面的域名即可
2. 配置 Chrome 插件的 Types
因为我们使用的是 TypeScripts 来进行开发 Chrome 插件,所以需要配置一个 Chrome 插件 API 等 Types
2.1. 安装 chrome-types 包
pnpm i chrome-types -D2.2. 配置 Types
在 src/vite-env.d.ts 文件中写入
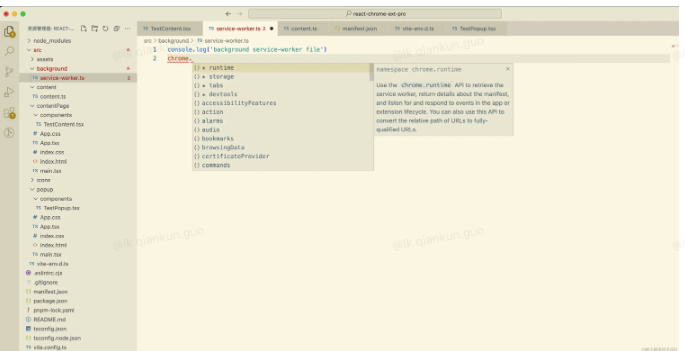
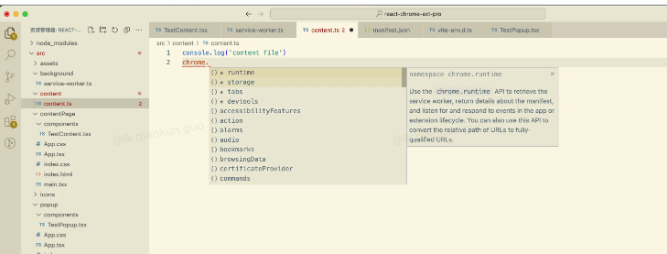
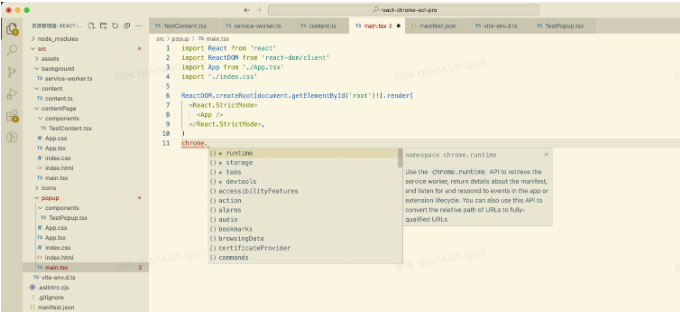
/// <reference types="chrome-types/index" />这样的话,就可以在 popup、content、background 中使用 chrome,并且有类型等提示
service-worker.ts
content.ts
popup/main.ts
3. 配置 vite.config.ts
配置构建文件,需要按照我们写入的 manifest.json 文件进行配置
3.1. 复制文件,使用 rollup-plugin-copy 复制 icons 以及 manifest.json 文件
通过复制可以直接把需要的文件复制到对应的目录中,这些复制的文件不需要构建,不需要压缩
3.1.1. 安装 rollup-plugin-copy
pnpm i rollup-plugin-copy -D3.1.2. 配置 vite.config.ts
import { defineConfig } from 'vite'
import react from '@vitejs/plugin-react-swc'
import copy from 'rollup-plugin-copy' // 引入 rollup-plugin-copy

// https://vitejs.dev/config/
export default defineConfig({
  root: 'src/',
  plugins: [
    react(),
    copy({
      targets: [
        { src: 'manifest.json', dest: 'dist' }, // 复制 manifest.json 到 dist 目录
        { src: "src/icons/**", dest: 'dist/icons' } // 复制 src/icons/** 到 dist/icons 目录
      ]
    })
  ],
})3.2. 配置 build 选项
build 构建,需要按照我们的 manifest.json 引入的配置
3.2.1. 需要引入 @types/node
pnpm i @types/node -D3.2.2. 配置 build
build: {
  outDir: path.resolve(__dirname, 'dist'),
    rollupOptions: {
    input: {
      popup: path.resolve(__dirname, 'src/popup/index.html'),
        contentPage: path.resolve(__dirname, 'src/contentPage/index.html'),
        content: path.resolve(__dirname, 'src/content/content.ts'),
        background: path.resolve(__dirname, 'src/background/service-worker.ts'),
        },
    output: {
      assetFileNames: 'assets/[name]-[hash].[ext]', // 静态资源
        chunkFileNames: 'js/[name]-[hash].js', // 代码分割中产生的 chunk
        entryFileNames: (chunkInfo) => { // 入口文件
        const baseName = path.basename(chunkInfo.facadeModuleId, path.extname(chunkInfo.facadeModuleId))
        const saveArr = ['content', 'service-worker']
        return `[name]/${saveArr.includes(baseName) ? baseName : chunkInfo.name}.js`;
      },
        name: '[name].js'
    }
  },
},3.2.2.1. 解析
input模块配四个文件,两个是页面,两个是ts文件output/entryFileNames配置,是判断如果传入的是content.ts和service-worker.ts,也用这两个当生成的文件名称
3.2.3. 配置 root
因为我们引入的页面是从 src 下面的引入的,所以需要配置下 root 字段
root: 'src/',3.3. 完整的 vite.config.ts 文件
import { defineConfig } from 'vite'
import react from '@vitejs/plugin-react-swc'
import path from 'path'
import copy from 'rollup-plugin-copy'

// https://vitejs.dev/config/
export default defineConfig({
  root: 'src/',
  plugins: [
    react(),
    copy({
      targets: [
        { src: 'manifest.json', dest: 'dist' },
        { src: "src/icons/**", dest: 'dist/icons' }
      ]
    })
  ],
  build: {
    outDir: path.resolve(__dirname, 'dist'),
    rollupOptions: {
      input: {
        popup: path.resolve(__dirname, 'src/popup/index.html'),
        contentPage: path.resolve(__dirname, 'src/contentPage/index.html'),
        content: path.resolve(__dirname, 'src/content/content.ts'),
        background: path.resolve(__dirname, 'src/background/service-worker.ts'),
      },
      output: {
        assetFileNames: 'assets/[name]-[hash].[ext]', // 静态资源
        chunkFileNames: 'js/[name]-[hash].js', // 代码分割中产生的 chunk
        entryFileNames: (chunkInfo) => { // 入口文件
          const baseName = path.basename(chunkInfo.facadeModuleId, path.extname(chunkInfo.facadeModuleId))
          const saveArr = ['content', 'service-worker']
          return `[name]/${saveArr.includes(baseName) ? baseName : chunkInfo.name}.js`;
        },
        name: '[name].js'
      }
    },
  },
})四、构建项目
1. 运行 build 命令
运行 pnpm run build,生成 dist 文件夹
pnpm run build2. dist 文件夹目录
dist
├── assets
│   └── popup-05NROAPV.css
├── background
│   └── service-worker.js
├── content
│   └── content.js
├── contentPage
│   ├── contentPage.js
│   └── index.html
├── icons
│   └── icon.png
├── js
│   └── client-37I-Sspp.js
├── manifest.json
└── popup
    ├── index.html
└── popup.js3. 加载已解压的扩展程序
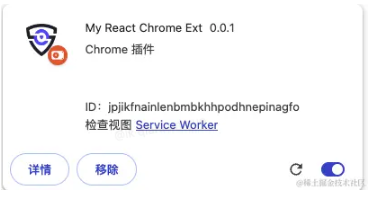
chrome://extensions/ 页面点击【加载已解压的扩展程序】选择 dist 目录
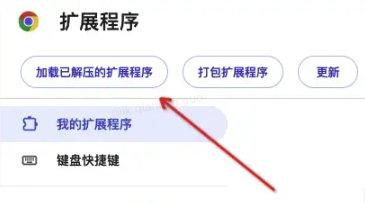
选择完之后,可以看到我们的插件已经出现在扩展程序列表中了
4. 打开本地页面
4.1. 控制台输出 content 内容
可以看到控制台输出了我们的 content.ts 文件的内容

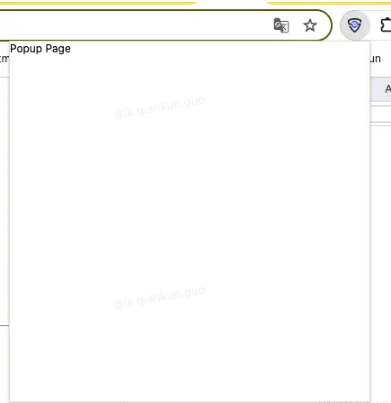
4.2. Popup action
把插件固定,点击插件 action 按钮,弹出 popup 页面 popup 中的 app.css 加个宽高
#app{
  width: 400px;
  height: 400px;
}
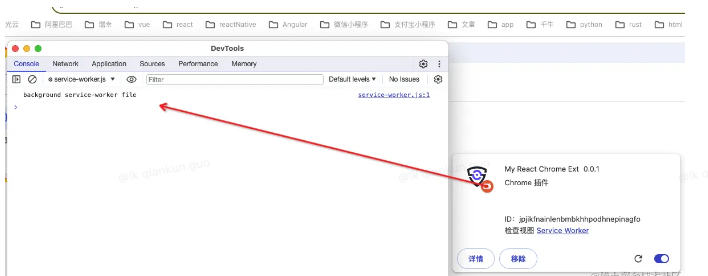
5. 打开插件控制台
可以看到 service-worker.ts 中的内容
6. Content page 如何注入页面?
我们的 vite.config.ts 中的 build 选项中还构建了一个 contentPage 页面呢,这个页面要怎么注入呢? 对于普通的注入 js 的文件,我们直接写在 content.ts 中,打包构建之后就可以注入了,这个 contentPage 存在的意义是向页面注入页面,一般是嵌在 iframe 中
6.1. Contnet.ts 中注入 iframe
在 contnet.ts 中写入以下代码
console.log('content file')
const init = () => {
  const addIframe = (id: string, pagePath: string) => {
    const contentIframe = document.createElement("iframe");
    contentIframe.id = id;
    contentIframe.style.cssText = "width: 100%; height: 100%; position: fixed; inset: 0px; margin: 0px auto; z-index: 10000002; border: none;";
    const getContentPage = chrome.runtime.getURL(pagePath);
    contentIframe.src = getContentPage;
    document.body.appendChild(contentIframe);
  }

  addIframe('content-start-iframe', 'contentPage/index.html')
}

init()解析:
- 通过
content.ts代码,生成iframe元素,src为我们的contentPage/index.html,这个路径获取需要通过chrome.runtime.getURL获取 - 为什么还要包裹一层
init函数?- 因为我们的
manifest.json中content_script的all_frames为true,这个代表着我们的content.ts会注入所有的frames中,加一个这个是在判断top与self相等的时候在注入
- 因为我们的
// 判断 window.top 和 self 是否相等,如果不相等,则不注入 iframe
if (window.top === window.self) {
  init();
}6.2. 重新构建项目
重新 build 项目,然后刷新插件,再刷新下我们的本地项目 可以发现:“此页面已被屏蔽”

但是我们打开控制台,可以发现我们的 iframe 已经注入到页面了,屏蔽的页面正是我们的 iframe
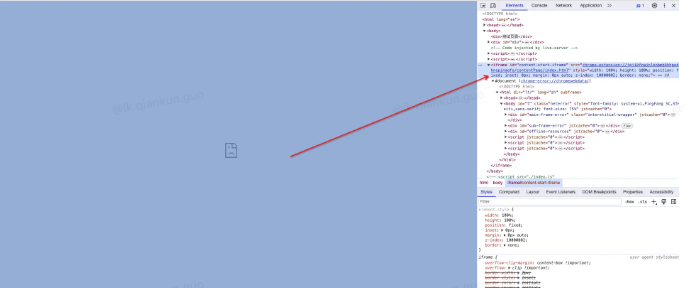
这样可不行啊,被屏蔽了怎么能行...
6.3. 配置 manifest.json 中的 web_accessible_resources 字段
web_accessible_resources:网络可访问的资源
"web_accessible_resources": [
  {
    "resources": ["popup/*", "contentPage/*", "assets/*", "js/*"],
    "matches": ["http://127.0.0.1:5500/*"],
    "use_dynamic_url": true
  }
]我们需要把我们插件的资源允许访问才行
- 匹配的
matches还是我们本地的域名,要和content_scripts中一致 resources是我们打包构建之后的dist里面的目录- 需要哪些写哪些,
"popup/*"可以删除不写
6.4 再次重新构建项目
重新 build 项目,刷新插件,刷新本地项目 contentPage 中的 app.css 加个宽高和背景色
#app{
  width: 400px;
  height: 400px;
  background: gray;
}可以看到我们的 iframe 已经加载了
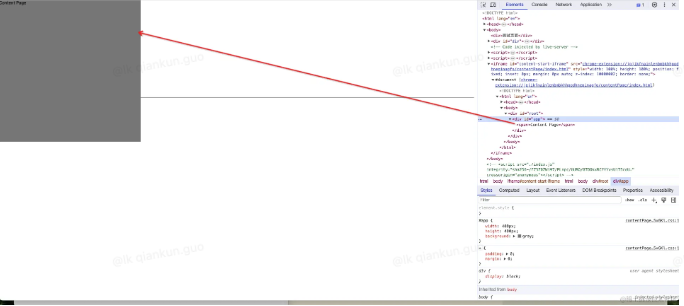
但是这个时候 iframe 把我们的项目挡住了,那其实我们可以先把 iframe 设置为 width: 0px,然后在某些需要展示 iframe 的时候在设置宽度即可
五、项目开发
1. 图片资源
图片资源使用比较简单,比如我们的 assets 文件夹放入一个图片
src/assets
├── Vite_React_Chrome_Ext.jpg
└── react.svg1.1. Popup 页面使用图片
- 直接引入,
TestPopup.tsx内容
import reactViteImg from '../../assets/Vite_React_Chrome_Ext.jpg'

export const TestPopup = () => {
  return (
    <>
      <span>Popup Page</span>
      <img src={reactViteImg} width="270px" height="170px" />
    </>
  )
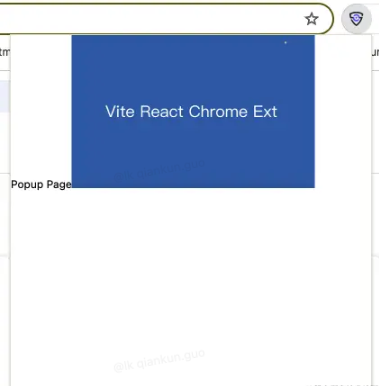
}- 重新
build项目,刷新插件,刷新页面,点击popup action,弹出popup页面
1.2. Content 页面使用图片
- 直接引入,
TestContent.tsx内容
import reactViteImg from '../../assets/Vite_React_Chrome_Ext.jpg'

export const TestContent = () => {
  return (
    <>
      <span>Content Page</span>
      <img src={reactViteImg} width="270px" height="170px" />
    </>
  )
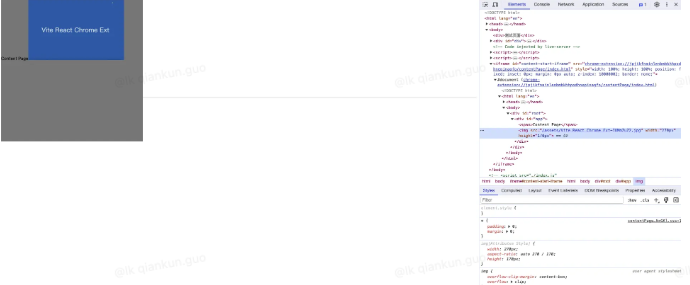
}- 重新
build项目,刷新插件,刷新页面
2. 使用 UI 库
以 Ant Design 为例
2.1. 安装 Ant Design 包
pnpm i antd2.2. Popup 页面使用
- 直接引入,
TestPopup.tsx内容:
import { Button } from 'antd'

import reactViteImg from '../../assets/Vite_React_Chrome_Ext.jpg'

export const TestPopup = () => {
  return (
    <>
      <span>Popup Page</span>
      <img src={reactViteImg} width="270px" height="170px" />
      <hr />
      <Button type="primary">Primary Button</Button>
      <Button>Default Button</Button>
      <Button type="dashed">Dashed Button</Button>
      <Button type="text">Text Button</Button>
      <Button type="link">Link Button</Button>
    </>
  )
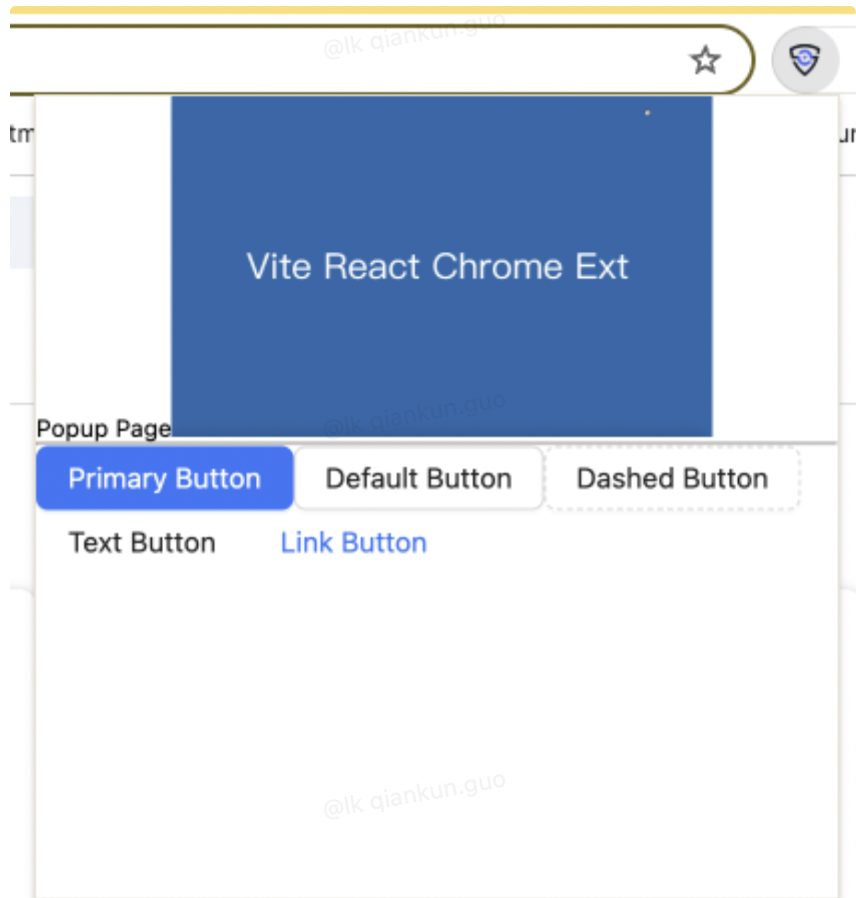
}- 重新
build项目,刷新插件,刷新页面,点击popup action,弹出popup页面
2.3. Content 页面使用
- 直接引入,
TestContent.tsx内容
import { Button } from 'antd'

import reactViteImg from '../../assets/Vite_React_Chrome_Ext.jpg'

export const TestContent = () => {
  return (
    <>
      <span>Content Page</span>
      <img src={reactViteImg} width="270px" height="170px" />
      <hr />
      <Button type="primary">Primary Button</Button>
      <Button>Default Button</Button>
      <Button type="dashed">Dashed Button</Button>
      <Button type="text">Text Button</Button>
      <Button type="link">Link Button</Button>
    </>
  )
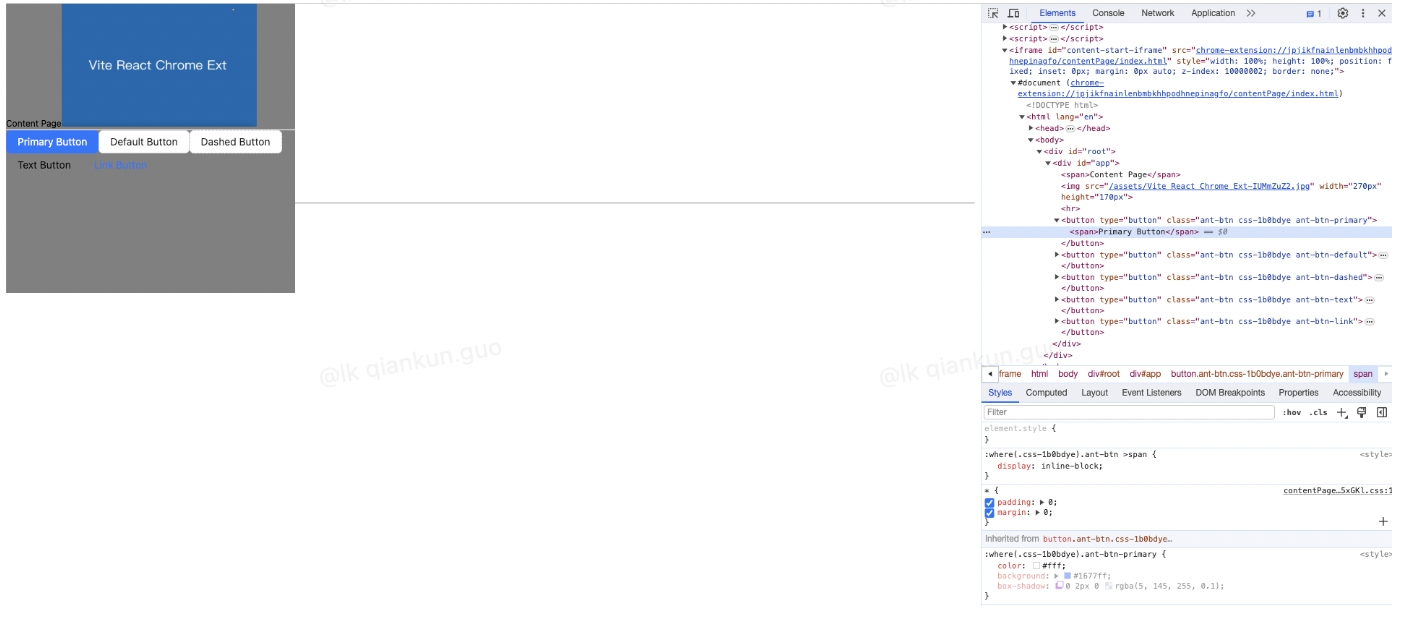
}- 重新
build项目,刷新插件,刷新页面
3. 状态管理 Zustand
Zustand 是一个简单而强大的状态管理库,它提供了一个小巧的 API,可以让你轻松地管理组件的状态。 Zustand 的 API 简单而直观,适用于小型到中型的应用。
3.1. 安装 zustand
pnpm i zustand3.2. Popup 页面使用
- 在
src/popup中新建store文件夹,新建store.ts文件
popup 文件夹目录
src/popup
├── App.css
├── App.tsx
├── components
│   └── TestPopup.tsx
├── index.css
├── index.html
├── main.tsx
└── store
└── store.tscounter.ts文件写入以下内容
import { create } from 'zustand';

interface ICountStoreState {
  count: number
  increment: (countNum: number) => void
  decrement: (countNum: number) => void
}

const useStore = create<ICountStoreState>((set) => ({
  count: 0,
  increment: (countNum: number) => set((state) => ({ count: state.count + countNum })),
  decrement: (countNum: number) => set((state) => ({ count: state.count - countNum })),
}));

export default useStore;- 在
TestPopup.tsx页面引入和使用
import { Button } from 'antd'

import useStore from '../store/store';
import reactViteImg from '../../assets/Vite_React_Chrome_Ext.jpg'

export const TestPopup = () => {
  const { count, increment, decrement } = useStore();
  return (
    <>
      <span>Popup Page</span>
      <div>
        <span>count is {count}</span>
        <button onClick={() => increment(1)}>
          increment 1
        </button>
        <button onClick={() => decrement(1)}>
          decrement 1
        </button>
      </div>
      <img src={reactViteImg} width="270px" height="170px" />
      <hr />
      <Button type="primary">Primary Button</Button>
      <Button>Default Button</Button>
      <Button type="dashed">Dashed Button</Button>
      <Button type="text">Text Button</Button>
      <Button type="link">Link Button</Button>
    </>
  )
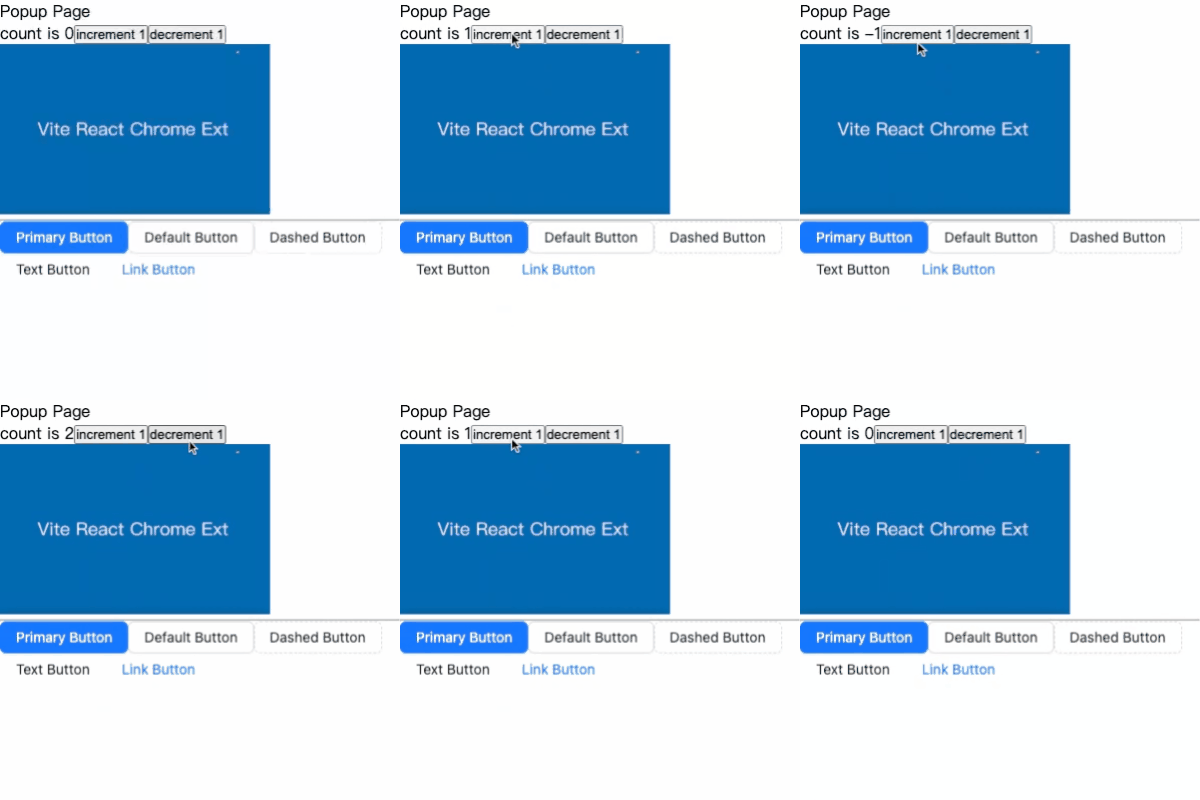
}- 重新
build,刷新插件,刷新页面,点击popup action弹出页面,点击按钮操作
3.3. Content 页面使用
- 在
src/contentPage中新建store文件夹,新建store.ts文件
文件夹目录
src/contentPage
├── App.css
├── App.tsx
├── components
│   ├── TestContent.tsx
├── index.css
├── index.html
├── main.tsx
└── store
└── store.tscounter.ts和popup中的store.ts一样即可
import { create } from 'zustand';

interface ICountStoreState {
  count: number
  increment: (countNum: number) => void
  decrement: (countNum: number) => void
}

const useStore = create<ICountStoreState>((set) => ({
  count: 0,
  increment: (countNum: number) => set((state) => ({ count: state.count + countNum })),
  decrement: (countNum: number) => set((state) => ({ count: state.count - countNum })),
}));

export default useStore;TestContent.tsx页面引入和使用
import { Button } from 'antd'

import useStore from '../store/store';
import reactViteImg from '../../assets/Vite_React_Chrome_Ext.jpg'

export const TestContent = () => {
  const { count, increment, decrement } = useStore();
  return (
    <>
      <span>Content Page</span>
      <div>
        <span>count is {count}</span>
        <button onClick={() => increment(1)}>
          increment 1
        </button>
        <button onClick={() => decrement(1)}>
          decrement 1
        </button>
      </div>
      <img src={reactViteImg} width="270px" height="170px" />
      <hr />
      <Button type="primary">Primary Button</Button>
      <Button>Default Button</Button>
      <Button type="dashed">Dashed Button</Button>
      <Button type="text">Text Button</Button>
      <Button type="link">Link Button</Button>
    </>
  )
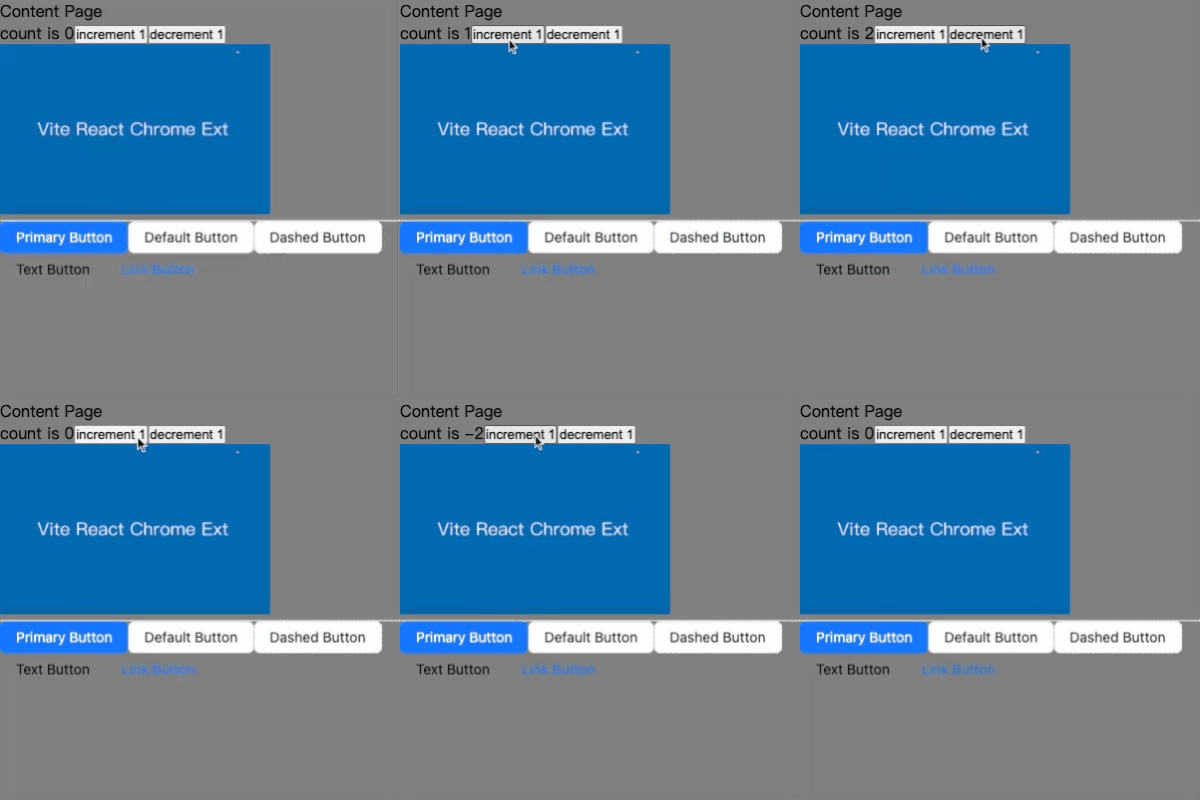
}- 重新
build,刷新插件,刷新页面
4. 使用 CSS 预处理器
Vite同时提供了对.scss, .sass, .less, .styl和.stylus文件的内置支持
因为 vite 内置支持,所以只需要安装依赖就行
4.1. 安装 less
pnpm i less -D4.2. Popup 页面使用
TestPopup.tsx中加入以下代码
<div className="test-popup">
  <ul>
    <li>popup</li>
  </ul>
</div>components新建index.less文件
src/popup/components
├── TestPopup.tsx
└── index.lessindex.less写入以下内容
.test-popup{
  background: red;
  padding: 20px;
  ul{
    padding: 20px;
    background: black;
    li{
      background: green;
      padding: 20px;
    }
  }
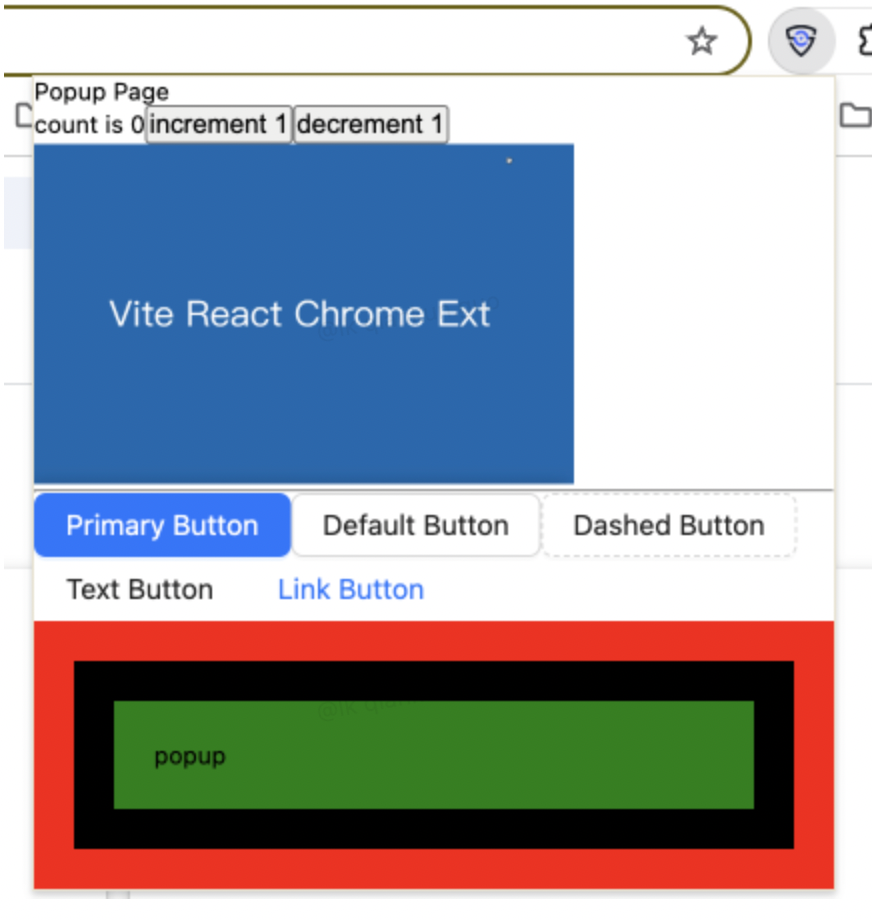
}TestPopup.tsx中引入index.less
import './index.less'Popup页面展示
4.3. Content 页面使用
TestContent.tsx中加入以下代码
<div className="test-content">
  <ul>
    <li>content</li>
  </ul>
</div>components新建index.less文件
src/contentPage/components
├── TestContent.tsx
└── index.lessindex.less写入以下内容
.test-content{
  background: red;
  padding: 20px;
  ul{
    padding: 20px;
    background: black;
    li{
      background: green;
      padding: 20px;
    }
  }
}TestContent.tsx中引入index.less
import './index.less'Content页面展示
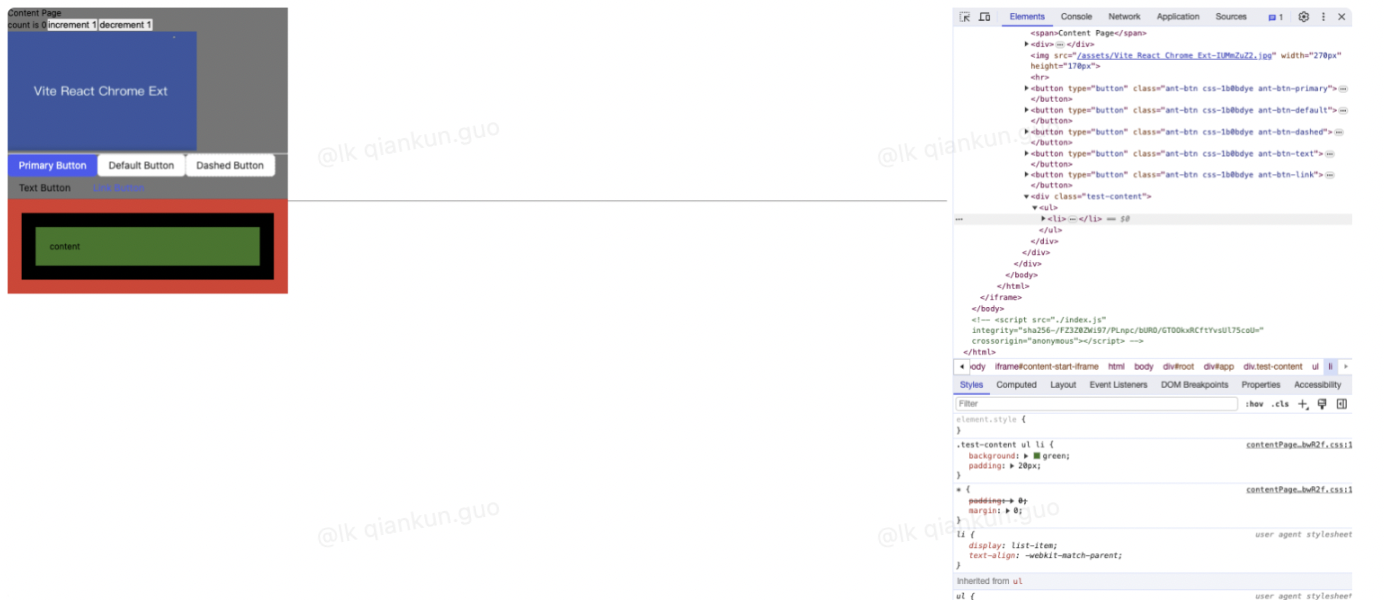
六、热加载
1. 只有 Popup 页面和 Content 页面需要热加载
如果我们的 manifest.json 文件基本上固定的,不需要更新,只需要 popup 页面和 content 页面在保存的时候进行 build 以及刷新的话,有一种很简单的方式
1.1. 我们本地启动的项目和我们插件的项目在同一个文件夹
这样的话,当我们点击保存的时候,会自动触发刷新页面
1.2. 配置新的 build script 命令,监听文件更新,重新 build
"watch-build": "vite --watch build"- 终端启动
- 更新
popup文件夹和content文件夹下的内容即可
pnpm run watch-build- 我的本地项目启动之后域名为:
http://127.0.0.1:5500/testhtml/test.html - 目录为:
/User/demo/chrome/testhtml/test.html - 插件根目录为:
/Users/demo/chrome/test-chrome/react-chrome-ext-pro - 我在
chrome这一层启动live-server服务,这个可以自动实现热加载 - 配置
build监听命令是为了保存的时候可以重新build,再配合刷新的话,这样就不用手动刷新插件和页面了 - 新更改的
popup页面和content页面也能及时的显示出来
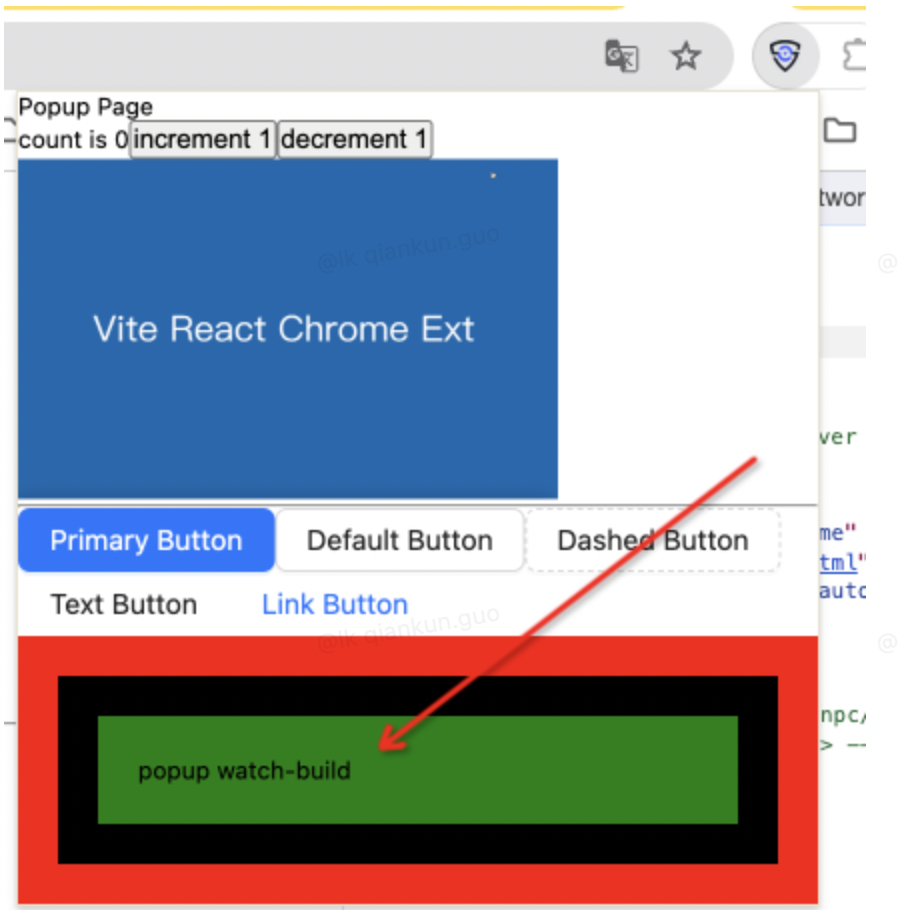
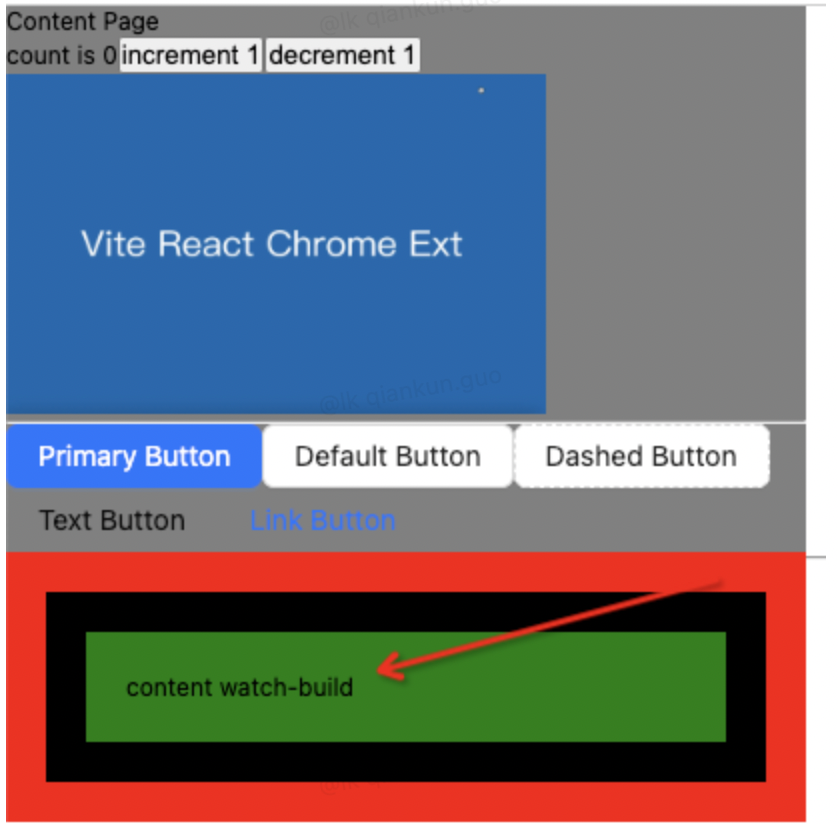
添加 watch-build 文案,不需要刷新插件也可显示出新页面
popup 页面
Content 页面
2. 插件模块热加载(background 的 service-worker.ts、content.ts 文件)
插件热加载的话是需要刷新插件的,而且同时也需要监听文件夹的变化 如果是在 V2 版本中,可以在 background.ts 中使用 getPackageDirectoryEntry 方法,获取文件夹内容以及监听变化 但是 getPackageDirectoryEntry 方法在 V3 中被限制了,只能在 popup 页面中使用,但是 popup 页面只有点击的时候才会弹出来... 所以,我们换个方法监听文件
2.1. service-worker.ts 文件写入以下内容
console.log('background service-worker file')
chrome.management.getSelf(self => {
  if (self.installType === 'development') {
    // 监听的文件列表
    const fileList = [
      'http://127.0.0.1:5501/dist/manifest.json',
      'http://127.0.0.1:5501/dist/popup/popup.js',
      'http://127.0.0.1:5501/dist/background/service-worker.js',
      'http://127.0.0.1:5501/dist/content/content.js',
      'http://127.0.0.1:5501/dist/contentPage/contentPage.js'
    ]
    // 文件列表内容字段
    const fileObj: {
      [prop: string]: string
    } = {}
    /**
     * reload 重新加载
     */
    const reload = () => {
      chrome.tabs.query(
        {
          active: true,
          currentWindow: true
        },
        (tabs: chrome.tabs.Tab[]) => {
          if (tabs[0]) {
            chrome.tabs.reload(tabs[0].id);
          }
          // 强制刷新页面
          chrome.runtime.reload();
        }
      );
    };

    /**
     * 遍历监听的文件,通过请求获取文件内容,判断是否需要刷新
     */
    const checkReloadPage = () => {
      fileList.forEach((item) => {
        fetch(item).then((res) => res.text())
          .then(files => {
            if (fileObj[item] && fileObj[item] !== files) {
              reload()
            } else {
              fileObj[item] = files
            }
          })
          .catch(error => {
            console.error('Error checking folder changes:', error);
          });
      })
    }

    // setInterval(() => {
    //   checkReloadPage()
    // }, 1000)

    /**
     * 设置闹钟(定时器)
     */
    // 闹钟名称
    const ALARM_NAME = 'LISTENER_FILE_TEXT_CHANGE';
    /**
     * 创建闹钟
     */
    const createAlarm = async () => {
      const alarm = await chrome.alarms.get(ALARM_NAME);
      if (typeof alarm === 'undefined') {
        chrome.alarms.create(ALARM_NAME, {
          periodInMinutes: 0.1
        });
        checkReloadPage();
      }
    }
    createAlarm();
    // 监听闹钟
    chrome.alarms.onAlarm.addListener(checkReloadPage);
  }
})- 第一行日志输出
- 第 2~3 两行是判断当开发环境为
development时,才会走以下流程 - 第 13~15 行是定义一个对象,
key就是文件列表的路径 - 第 19~33 行是刷新插件和刷新当前
tab页面 - 第 38~52 行是遍历文件列表,通过
fetch请求获取文件内容,进行判断是否和fileObj中保存的数据是否一致,如果不一致则进行reload - 第 54~56 行是定义一个
setInterval,间隔多少时间进行遍历文件内容去判断 - 第 62~77 行是用
Chrome的alarms来当定时器(建议)
2.2. 配置 Manifest.json 文件
因为使用了一些 Chrome 的 API,所以需要添加权限才行
"permissions": [
  "activeTab",
  "tabs",
  "alarms"
],2.3. 配置 build script 命令,监听文件更新,重新 build
"watch-build": "vite --watch build"- 终端启动
pnpm run watch-build- 新
build的包,第一次还是需要点击刷新按钮才行 - 之后再更新
service-worker.ts/content.ts或者popup以及content的页面的时候就会自动刷新了 - 可以看到
alarms创建的闹钟最小时间是 6s,如果觉得太长的话可以使用上面的setInterval
3. Manifest.json 文件热加载
可以发现我们修改 manifest.json 文件还是不会触发热加载,这就需要重新配置,我们使用 nodemon 监听
3.1. 全局安装 nodemon
npm i nodemon -g3.2. 项目根目录新建 watch.mjs 文件,写入以下内容
import { spawn } from 'child_process';
import path from 'path';
import { fileURLToPath } from 'url';
import { dirname } from 'path';

const __filename = fileURLToPath(import.meta.url);
const __dirname = dirname(__filename);

const VITE_BIN_PATH = path.resolve(__dirname, 'node_modules/.bin/vite');

const watcher = spawn('nodemon', ['--watch', 'manifest.json', '--exec', VITE_BIN_PATH, 'build'], {
  stdio: 'inherit',
});
watcher.on('exit', (code) => {
  process.exit(code);
});- 使用
nodemon监听manifest.json文件,触发监听
3.3. 配置新的 script
"watch-json": "node watch.mjs"再启动一个终端进行 json 的监听
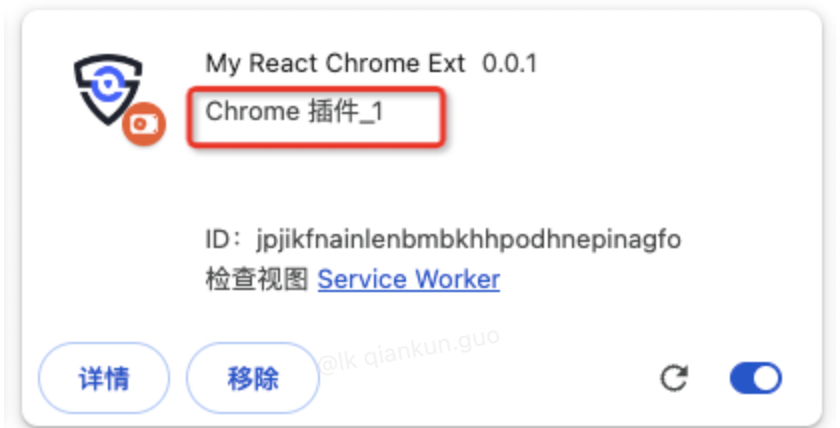
pnpm run watch-json此时更改 manifest.json 文件,在 alarms 触发之后就会刷新插件了
修改 description 字段
4. 插件报错
如果你的插件报如下的错
Error checking folder changes: TypeError: Failed to fetch
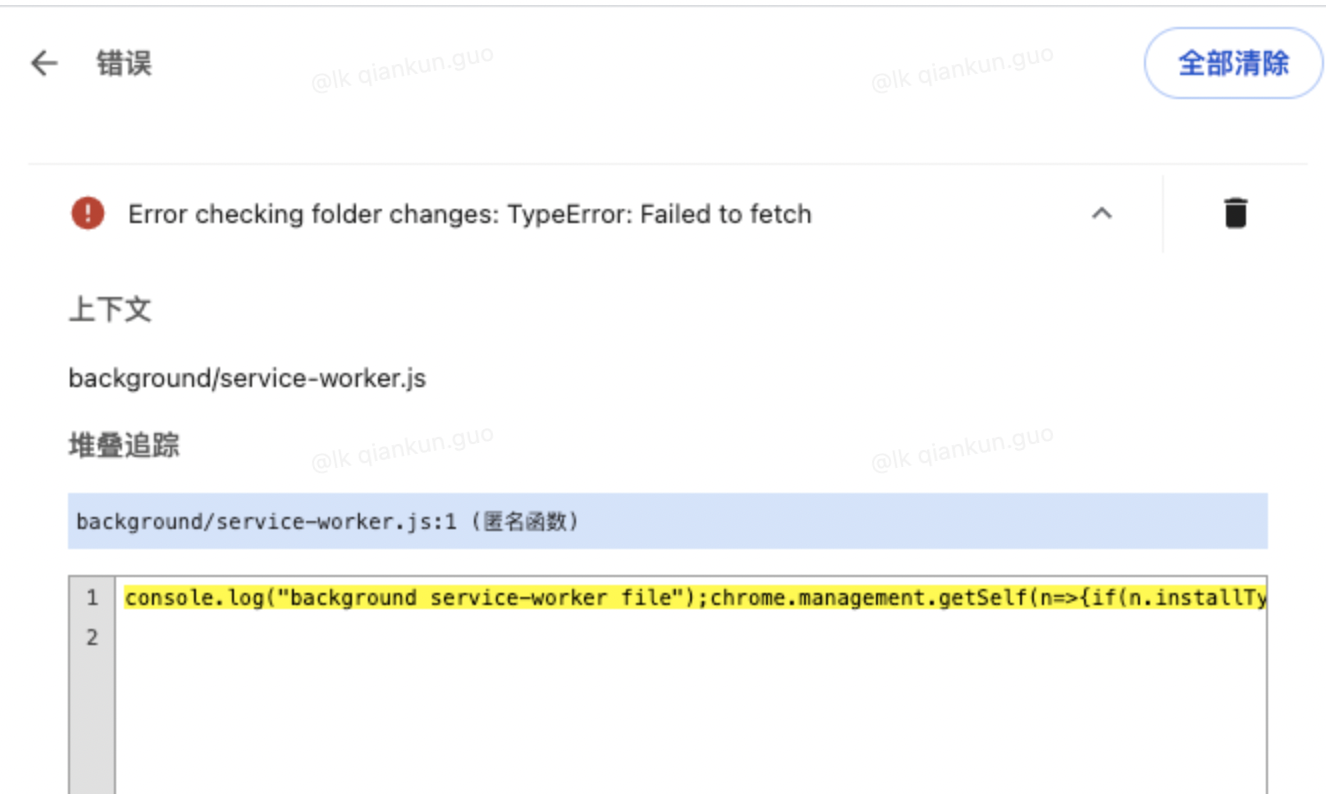
这说明你的监听请求有问题,需要看下是不是服务被停止了,重启服务然后清除错误刷新插件即可
七、项目最终目录结构
.
├── README.md								# readme 文件
├── manifest.json							# 插件配置文件、入口文件
├── package.json							# 项目配置文件
├── pnpm-lock.yaml
├── src
│   ├── assets								# 静态资源页面
│   │   ├── Vite_React_Chrome_Ext.jpg
│   │   └── react.svg
│   ├── background							# manifest.json 中 background 字段
│   │   └── service-worker.ts
│   ├── content								# manifest.json 中 content_scripts 字段
│   │   └── content.ts
│   ├── contentPage							# iframe 内嵌页面
│   │   ├── App.css
│   │   ├── App.tsx
│   │   ├── components
│   │   │   ├── TestContent.tsx
│   │   │   ├── index.css
│   │   │   └── index.less
│   │   ├── index.css
│   │   ├── index.html
│   │   ├── main.tsx
│   │   └── store
│   │       └── store.ts
│   ├── icons								# 插件 icons 资源
│   │   └── icon.png
│   ├── popup								# 插件 popup action 页面
│   │   ├── App.css
│   │   ├── App.tsx
│   │   ├── components
│   │   │   ├── TestPopup.tsx
│   │   │   ├── index.css
│   │   │   └── index.less
│   │   ├── index.css
│   │   ├── index.html
│   │   ├── main.tsx
│   │   └── store
│   │       └── store.ts
│   └── vite-env.d.ts						# 类型声明
├── tsconfig.json
├── tsconfig.node.json
├── vite.config.ts							# vite 配置文件
└── watch.mjs # 监听 manifest.json 变化的文件八、总结
- 使用
React、TS、UI AntD库、Less、状态管理zustand、Vite开发浏览器插件到这整个流程就已经走完了,插件涉及的页面也都包括在内了 - 开发上线的时候只需要把
http://127.0.0.1:5500/换成插件需要的域名即可 Vite配置和React项目都是我们手动修改的,可以很好的适配自己的项目